> ## Documentation Index
> Fetch the complete documentation index at: https://docs.weryai.com/llms.txt
> Use this file to discover all available pages before exploring further.
# Quick Start
> Get started with WeryAI API in minutes
## Prerequisites
Before you start using WeryAI API, you need to complete the following setup:
### 1. Register and Create API Key
Visit [WeryAI API Keys Management](https://weryai.com/api/keys) to:
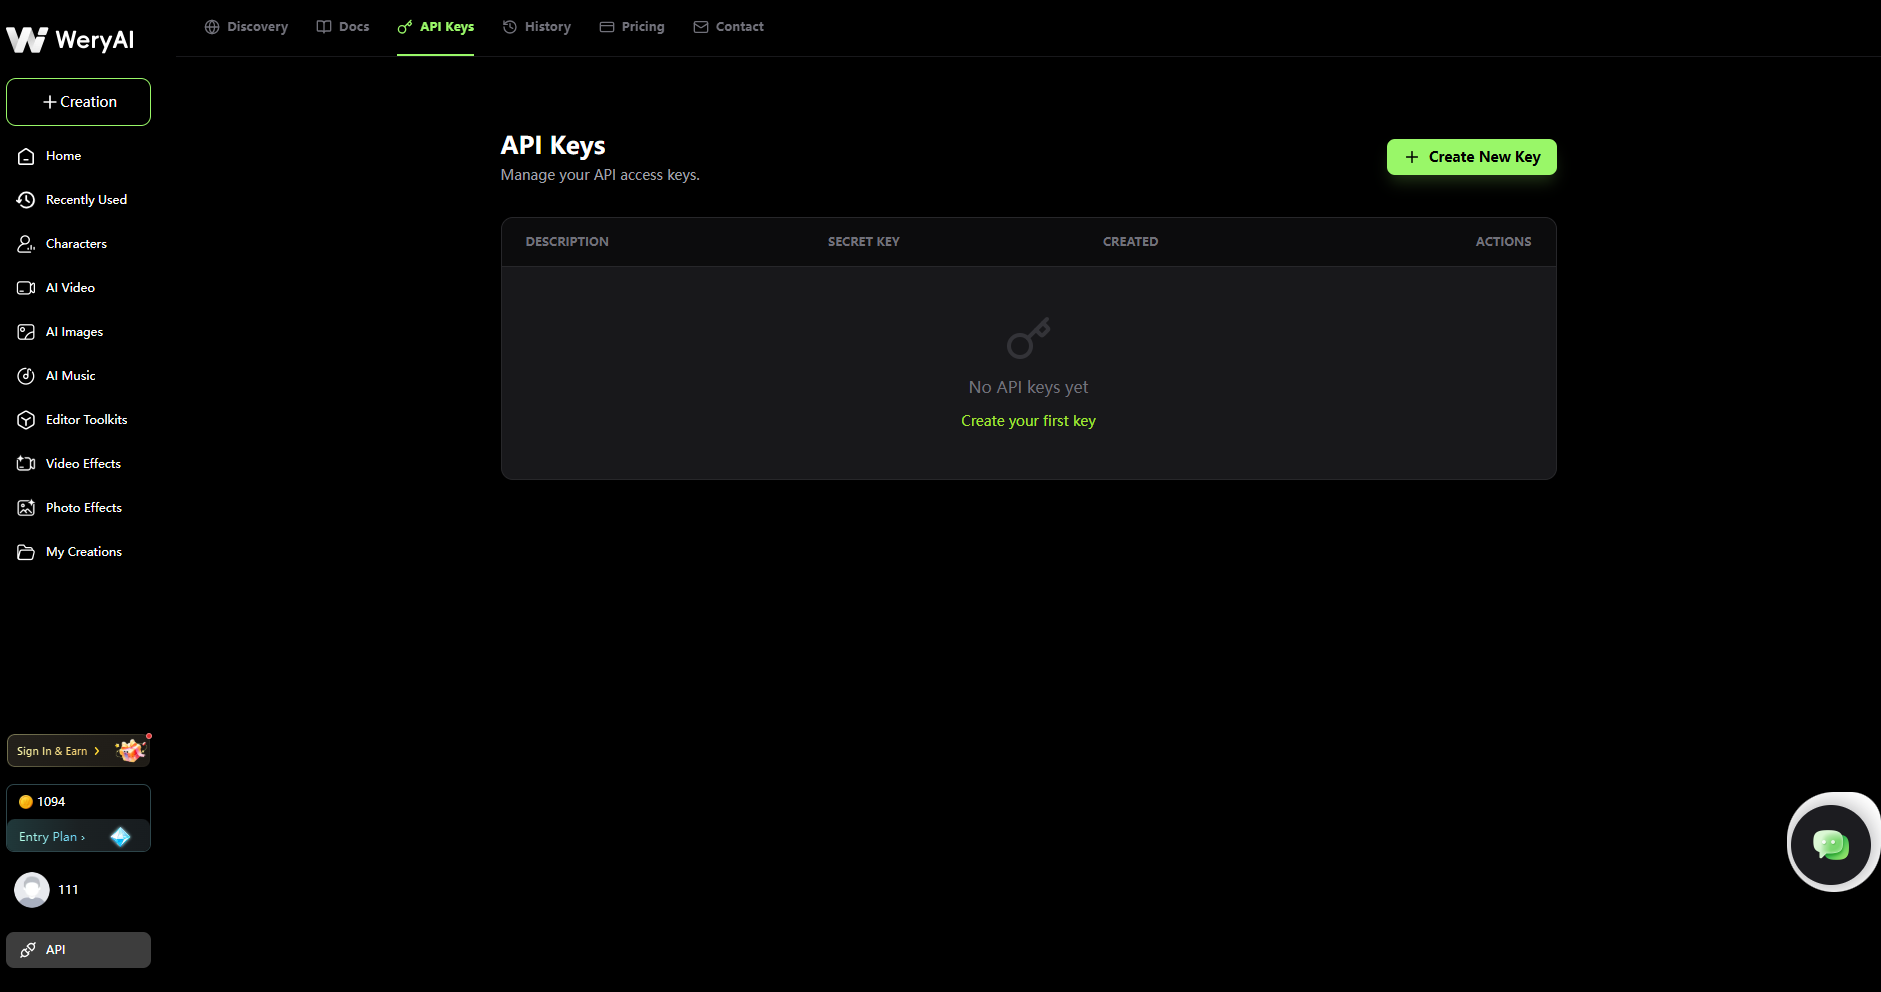 If you don't have an account yet, register for a WeryAI account
On the API Keys page, click the "Create New Key" button to generate your API Key
If you don't have an account yet, register for a WeryAI account
On the API Keys page, click the "Create New Key" button to generate your API Key
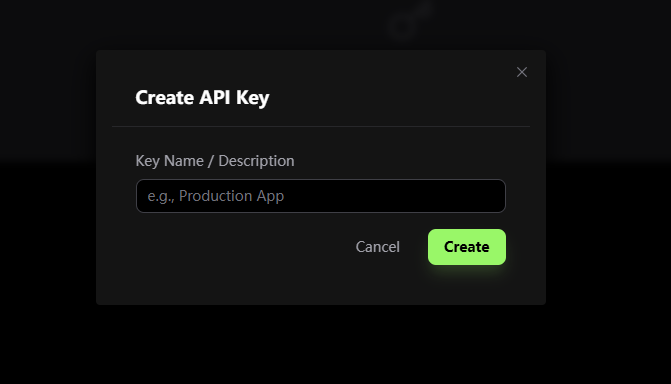 Copy the generated API key and save it securely (key format like: `sk-d77e1...343e`)
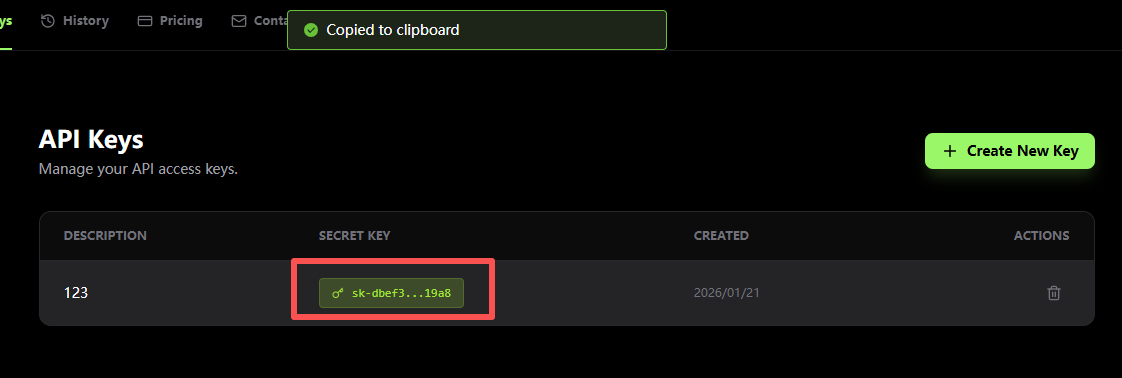 Keep your API key secure! Never share it publicly or commit it to version control. Store it in environment variables.
### 2. Purchase Credits
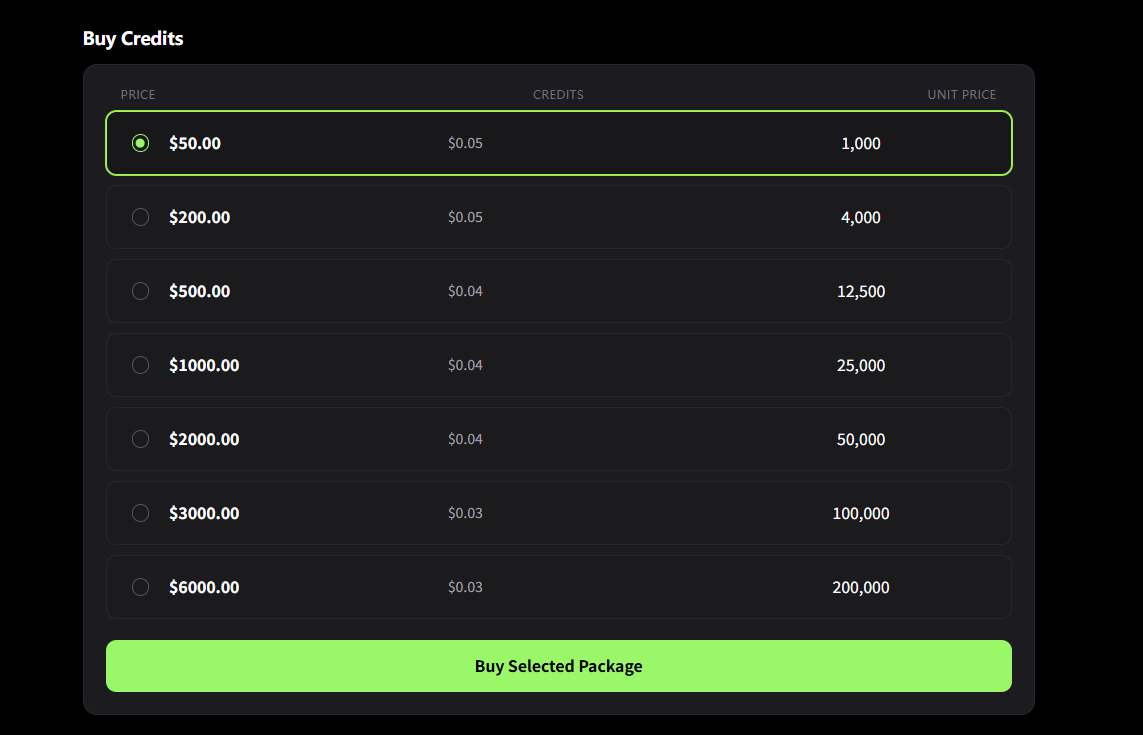
Visit the [Pricing page](https://weryai.com/api/pricing) to purchase credits:
Keep your API key secure! Never share it publicly or commit it to version control. Store it in environment variables.
### 2. Purchase Credits
Visit the [Pricing page](https://weryai.com/api/pricing) to purchase credits:
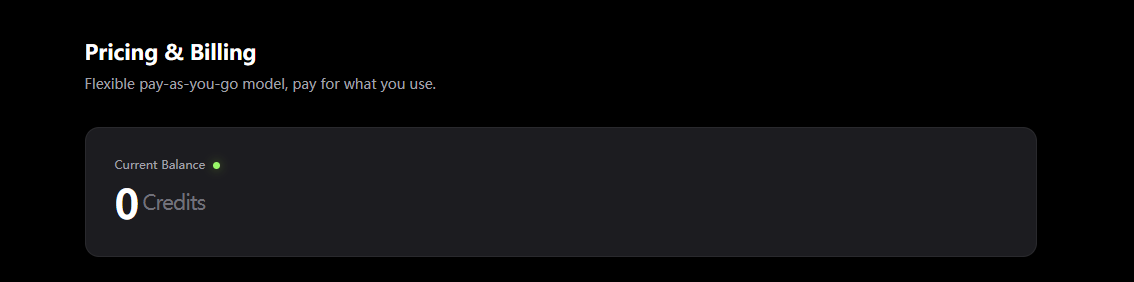 * Check your current account balance
* Choose a suitable recharge package ($50.00 to $6000.00 multiple tiers)
* After payment, credits will be added to your account immediately
* Check your current account balance
* Choose a suitable recharge package ($50.00 to $6000.00 multiple tiers)
* After payment, credits will be added to your account immediately
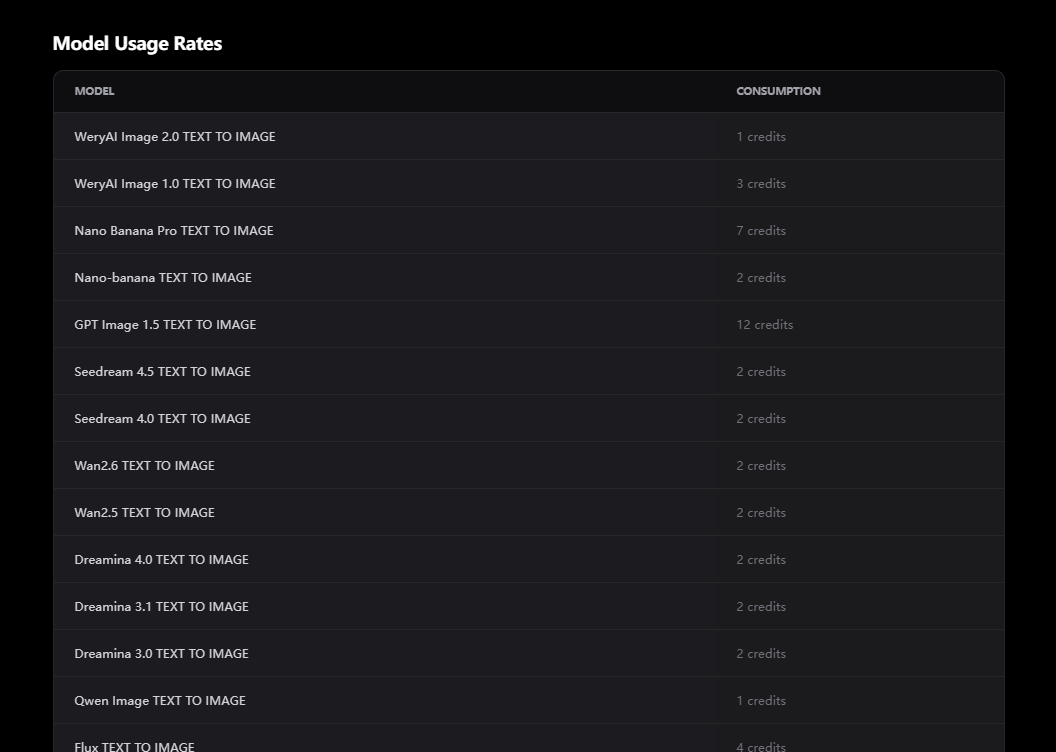
 Different AI models consume different amounts of credits. You can view the detailed model consumption rate table on the pricing page.
 ## Authentication
All API requests require authentication using your API key in the `Authorization` header:
```bash theme={null}
Authorization: Bearer YOUR_API_KEY
```
Replace `YOUR_API_KEY` with the actual key you created on the [API Keys page](https://weryai.com/api/keys).
## Your First Request
Let's generate your first image using the text-to-image API:
```bash cURL theme={null}
curl -X POST https://api.weryai.com/v1/generation/text-to-image \
-H "Authorization: Bearer YOUR_API_KEY" \
-H "Content-Type: application/json" \
-d '{
"model": "FLUX_PRO",
"prompt": "A beautiful sunset over the ocean, vibrant colors",
"aspect_ratio": "16:9",
"resolution": "1080p",
"image_number": 1
}'
```
```python Python theme={null}
import requests
url = "https://api.weryai.com/v1/generation/text-to-image"
headers = {
"Authorization": "Bearer YOUR_API_KEY",
"Content-Type": "application/json"
}
payload = {
"model": "FLUX_PRO",
"prompt": "A beautiful sunset over the ocean, vibrant colors",
"aspect_ratio": "16:9",
"resolution": "1080p",
"image_number": 1
}
response = requests.post(url, json=payload, headers=headers)
result = response.json()
print(result)
```
```javascript JavaScript theme={null}
const response = await fetch('https://api.weryai.com/v1/generation/text-to-image', {
method: 'POST',
headers: {
'Authorization': 'Bearer YOUR_API_KEY',
'Content-Type': 'application/json'
},
body: JSON.stringify({
model: 'FLUX_PRO',
prompt: 'A beautiful sunset over the ocean, vibrant colors',
aspect_ratio: '16:9',
resolution: '1080p',
image_number: 1
})
});
const result = await response.json();
console.log(result);
```
### Response
The API will return a response containing `batch_id` and `task_ids`:
```json theme={null}
{
"status": 0,
"desc": "success",
"message": "success",
"data": {
"batch_id": 123456789,
"task_ids": ["task_abc123"]
}
}
```
## Query Task Status
Since generation tasks are processed asynchronously, use the task ID to query the status:
```bash cURL theme={null}
curl -X GET https://api.weryai.com/v1/generation/task_abc123/status \
-H "Authorization: Bearer YOUR_API_KEY"
```
```python Python theme={null}
import requests
import time
url = "https://api.weryai.com/v1/generation/task_abc123/status"
headers = {"Authorization": "Bearer YOUR_API_KEY"}
# Poll until task completes
while True:
response = requests.get(url, headers=headers)
result = response.json()
status = result["data"]["task_status"]
print(f"Task status: {status}")
if status == "succeed":
images = result["data"]["images"]
print(f"Generated images: {images}")
break
elif status == "failed":
print(f"Task failed: {result['data'].get('msg')}")
break
time.sleep(3) # Wait 3 seconds before checking again
```
```javascript JavaScript theme={null}
async function checkTaskStatus(taskId) {
const url = `https://api.weryai.com/v1/generation/${taskId}/status`;
while (true) {
const response = await fetch(url, {
headers: {
'Authorization': 'Bearer YOUR_API_KEY'
}
});
const result = await response.json();
const status = result.data.task_status;
console.log(`Task status: ${status}`);
if (status === 'succeed') {
console.log('Generated images:', result.data.images);
break;
} else if (status === 'failed') {
console.log('Task failed:', result.data.msg);
break;
}
await new Promise(resolve => setTimeout(resolve, 3000));
}
}
checkTaskStatus('task_abc123');
```
### Success Response
When the task completes, you'll receive the generated images:
```json theme={null}
{
"status": 0,
"desc": "success",
"message": "success",
"data": {
"task_id": "task_abc123",
"task_status": "succeed",
"images": [
"https://cdn.weryai.com/result/image1.png"
]
}
}
```
## Using Webhooks
You can provide a `webhook_url` to automatically receive results instead of polling:
```json theme={null}
{
"model": "FLUX_PRO",
"prompt": "A beautiful sunset over the ocean",
"aspect_ratio": "16:9",
"webhook_url": "https://your-server.com/webhook"
}
```
When the task completes, WeryAI will send a POST request with the results to your webhook URL.
## Task Status
Tasks can have the following statuses:
* **waiting** - Task is waiting to be processed
* **processing** - Task is being generated
* **succeed** - Task completed successfully
* **failed** - Task failed (check the `msg` field for error details)
## View Call History
You can view all API call records on the [Call History page](https://weryai.com/api/history):
## Authentication
All API requests require authentication using your API key in the `Authorization` header:
```bash theme={null}
Authorization: Bearer YOUR_API_KEY
```
Replace `YOUR_API_KEY` with the actual key you created on the [API Keys page](https://weryai.com/api/keys).
## Your First Request
Let's generate your first image using the text-to-image API:
```bash cURL theme={null}
curl -X POST https://api.weryai.com/v1/generation/text-to-image \
-H "Authorization: Bearer YOUR_API_KEY" \
-H "Content-Type: application/json" \
-d '{
"model": "FLUX_PRO",
"prompt": "A beautiful sunset over the ocean, vibrant colors",
"aspect_ratio": "16:9",
"resolution": "1080p",
"image_number": 1
}'
```
```python Python theme={null}
import requests
url = "https://api.weryai.com/v1/generation/text-to-image"
headers = {
"Authorization": "Bearer YOUR_API_KEY",
"Content-Type": "application/json"
}
payload = {
"model": "FLUX_PRO",
"prompt": "A beautiful sunset over the ocean, vibrant colors",
"aspect_ratio": "16:9",
"resolution": "1080p",
"image_number": 1
}
response = requests.post(url, json=payload, headers=headers)
result = response.json()
print(result)
```
```javascript JavaScript theme={null}
const response = await fetch('https://api.weryai.com/v1/generation/text-to-image', {
method: 'POST',
headers: {
'Authorization': 'Bearer YOUR_API_KEY',
'Content-Type': 'application/json'
},
body: JSON.stringify({
model: 'FLUX_PRO',
prompt: 'A beautiful sunset over the ocean, vibrant colors',
aspect_ratio: '16:9',
resolution: '1080p',
image_number: 1
})
});
const result = await response.json();
console.log(result);
```
### Response
The API will return a response containing `batch_id` and `task_ids`:
```json theme={null}
{
"status": 0,
"desc": "success",
"message": "success",
"data": {
"batch_id": 123456789,
"task_ids": ["task_abc123"]
}
}
```
## Query Task Status
Since generation tasks are processed asynchronously, use the task ID to query the status:
```bash cURL theme={null}
curl -X GET https://api.weryai.com/v1/generation/task_abc123/status \
-H "Authorization: Bearer YOUR_API_KEY"
```
```python Python theme={null}
import requests
import time
url = "https://api.weryai.com/v1/generation/task_abc123/status"
headers = {"Authorization": "Bearer YOUR_API_KEY"}
# Poll until task completes
while True:
response = requests.get(url, headers=headers)
result = response.json()
status = result["data"]["task_status"]
print(f"Task status: {status}")
if status == "succeed":
images = result["data"]["images"]
print(f"Generated images: {images}")
break
elif status == "failed":
print(f"Task failed: {result['data'].get('msg')}")
break
time.sleep(3) # Wait 3 seconds before checking again
```
```javascript JavaScript theme={null}
async function checkTaskStatus(taskId) {
const url = `https://api.weryai.com/v1/generation/${taskId}/status`;
while (true) {
const response = await fetch(url, {
headers: {
'Authorization': 'Bearer YOUR_API_KEY'
}
});
const result = await response.json();
const status = result.data.task_status;
console.log(`Task status: ${status}`);
if (status === 'succeed') {
console.log('Generated images:', result.data.images);
break;
} else if (status === 'failed') {
console.log('Task failed:', result.data.msg);
break;
}
await new Promise(resolve => setTimeout(resolve, 3000));
}
}
checkTaskStatus('task_abc123');
```
### Success Response
When the task completes, you'll receive the generated images:
```json theme={null}
{
"status": 0,
"desc": "success",
"message": "success",
"data": {
"task_id": "task_abc123",
"task_status": "succeed",
"images": [
"https://cdn.weryai.com/result/image1.png"
]
}
}
```
## Using Webhooks
You can provide a `webhook_url` to automatically receive results instead of polling:
```json theme={null}
{
"model": "FLUX_PRO",
"prompt": "A beautiful sunset over the ocean",
"aspect_ratio": "16:9",
"webhook_url": "https://your-server.com/webhook"
}
```
When the task completes, WeryAI will send a POST request with the results to your webhook URL.
## Task Status
Tasks can have the following statuses:
* **waiting** - Task is waiting to be processed
* **processing** - Task is being generated
* **succeed** - Task completed successfully
* **failed** - Task failed (check the `msg` field for error details)
## View Call History
You can view all API call records on the [Call History page](https://weryai.com/api/history):
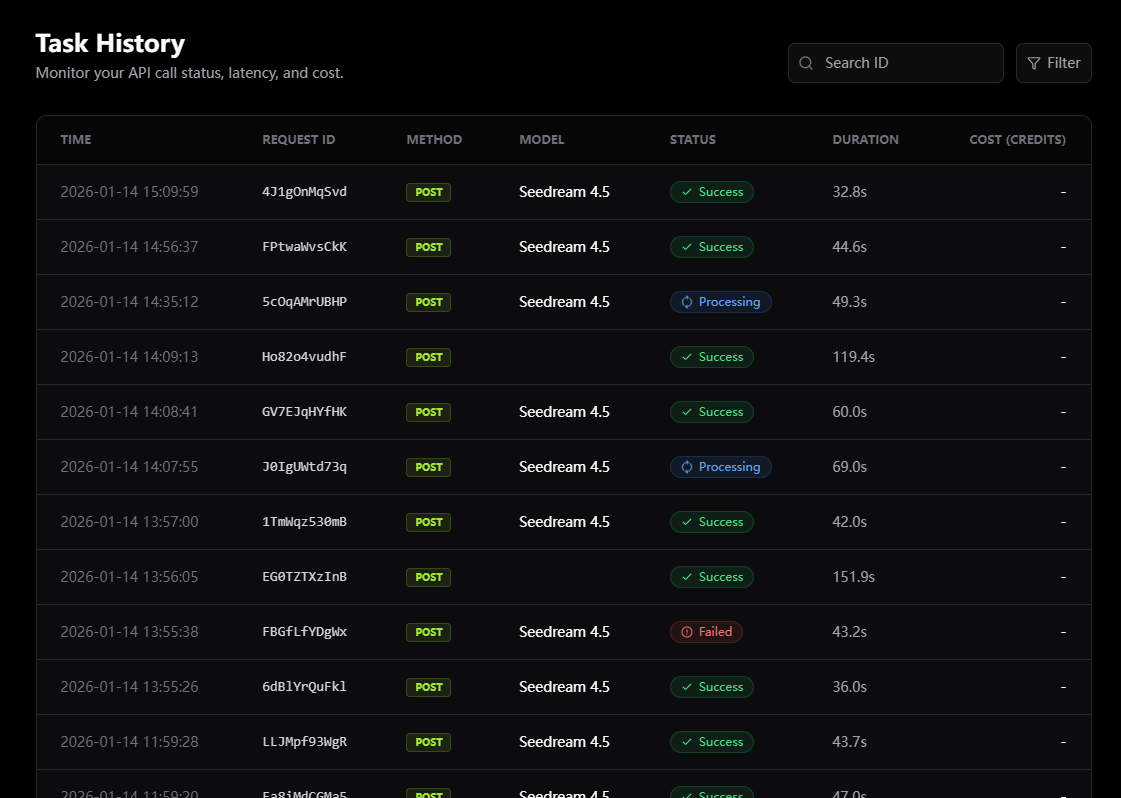 * View detailed information for each request
* Search for specific requests by request ID
* View request method, path, status code, and duration
* Convenient for debugging and tracking issues
## Next Steps
Explore all available endpoints and parameters
Learn best practices and advanced features
Create stunning videos with AI
Learn about model consumption and purchase credits
## FAQ
Check if your API key is correct and properly formatted in the Authorization header. You can view or recreate keys on the [API Keys page](https://weryai.com/api/keys).
Peak times may cause delays. Tasks usually start processing within a few minutes. You can view request details on the [Call History page](https://weryai.com/api/history).
Your prompt may violate content policies. Please review and modify your prompt to avoid sensitive or inappropriate content.
Visit the [Pricing page](https://weryai.com/api/pricing) to view your current account credit balance and purchase more credits.
On the [Pricing page](https://weryai.com/api/pricing), scroll down to see the "Model Consumption Rate" table, which lists all models and their credit consumption.
Need help? Visit [WeryAI website](https://weryai.com) to contact our support team.
* View detailed information for each request
* Search for specific requests by request ID
* View request method, path, status code, and duration
* Convenient for debugging and tracking issues
## Next Steps
Explore all available endpoints and parameters
Learn best practices and advanced features
Create stunning videos with AI
Learn about model consumption and purchase credits
## FAQ
Check if your API key is correct and properly formatted in the Authorization header. You can view or recreate keys on the [API Keys page](https://weryai.com/api/keys).
Peak times may cause delays. Tasks usually start processing within a few minutes. You can view request details on the [Call History page](https://weryai.com/api/history).
Your prompt may violate content policies. Please review and modify your prompt to avoid sensitive or inappropriate content.
Visit the [Pricing page](https://weryai.com/api/pricing) to view your current account credit balance and purchase more credits.
On the [Pricing page](https://weryai.com/api/pricing), scroll down to see the "Model Consumption Rate" table, which lists all models and their credit consumption.
Need help? Visit [WeryAI website](https://weryai.com) to contact our support team.